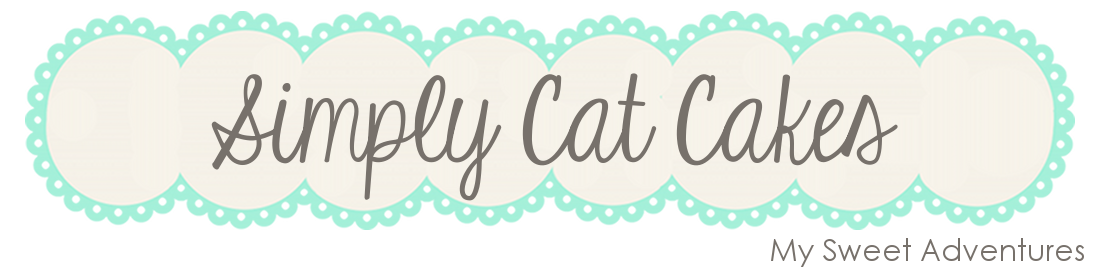
I am not sure if you all have recently been brain washed by Pinterest...but I have! Who knew that such a silly little application would create hours of fun and inspiration. In my recent pinterest treasure searching I came across a cupcake nail design. I knew that at that moment that I had to have that sweet design on my nails.
If you are like me, right handed, creating designs on your left hand is a piece of cake! However, when attempting to recreate the same design with your left hand...it always looks like a chicken trampled your nails. Needless to say for this design I did not attempt to recreate it on my right hand.
Below is my super simple design tutorial. Please try not to judge my sad muffin tops :)
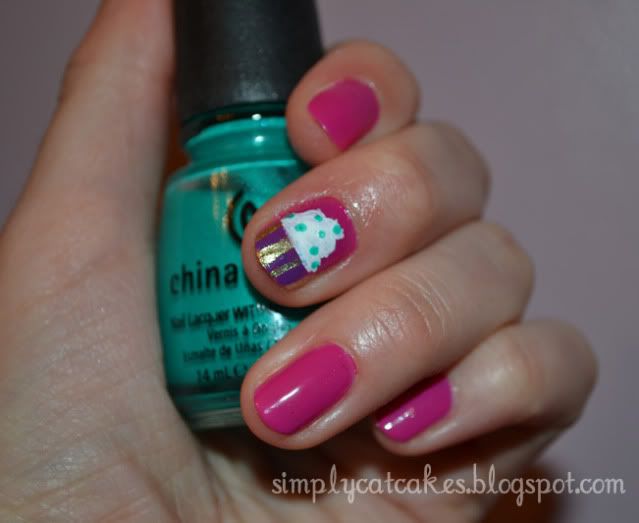
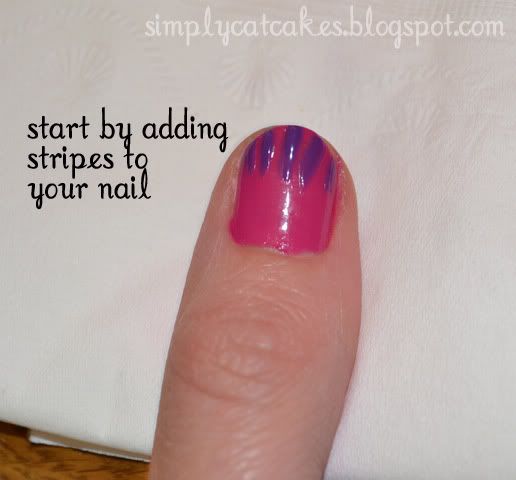
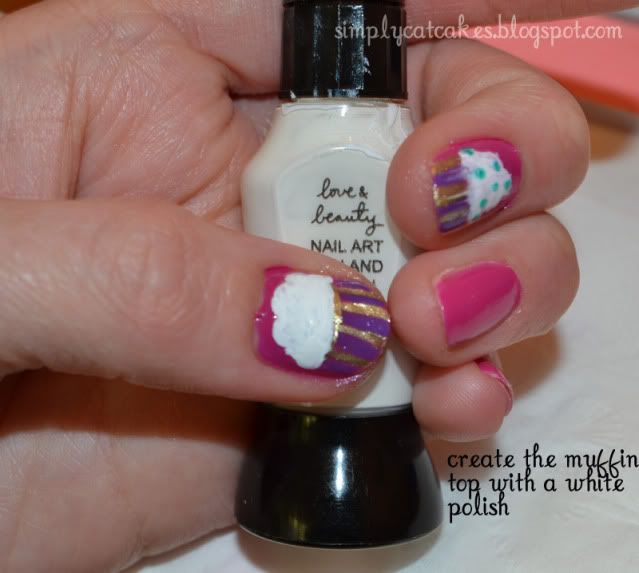
For my design, I painted my nails as I normally do. Then I picked a contrasting bright color and used a skinny tip polish to create small stripes. This will become the cupcake holder for your cupcake.
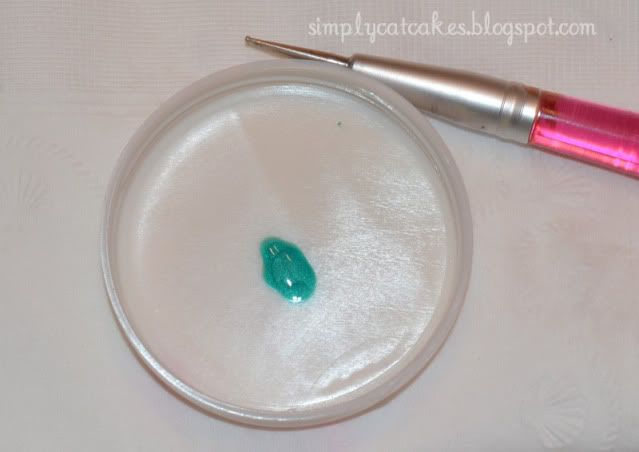
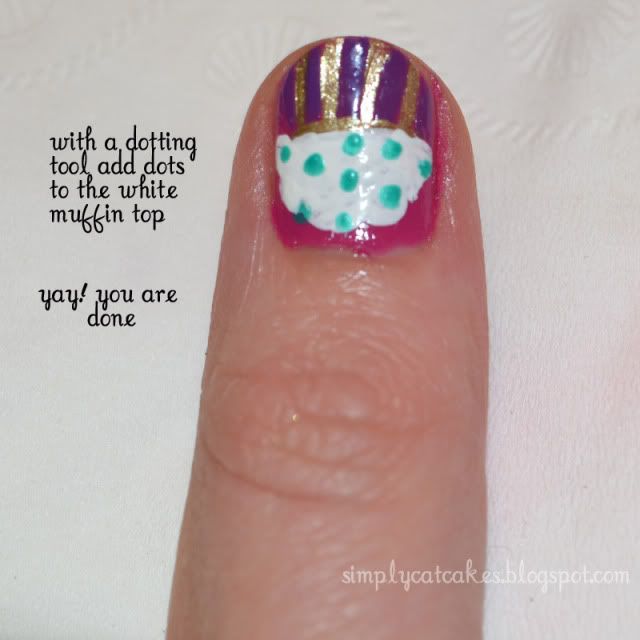
To create the sprinkles in my cupcake, I used a bit of polish and a dotting tool. I would recommend getting a dotting tool since it makes dotting super easy. Dotting tools are really inexpensive. On ebay, you can typically purchase a 5 piece dotting set for a buck or two!
Make sure your design is fully dry before adding a top coat or else your colors will run.
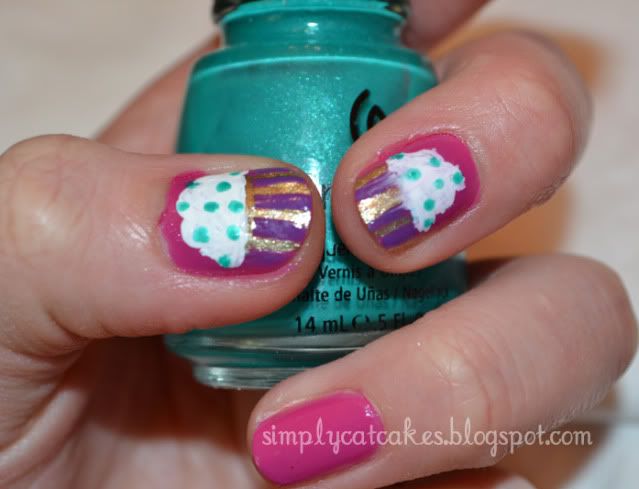
I hope you enjoyed this easy nail tutorial!
Until next time,


